Handbrake Improvers
I doubt whether I'm the only Herald owner who's had the discussion with the MoT tester regarding the handbrake efficiency of our cars, despite the fact than I have far more confidence in it than my main car, a Mercedes SLK. When parked on a hill I always leave the SLK in gearwith the wheels into the kerb, whereas the Herald I never think twice, just pull up the handbrake and leave it.
According to my local MoT tester the reason the Herald only just makes it through is because it has a single circuit braking system, so it must score higher than a car with dual circuit. No real comfort come the MoT test when you have the nervous wait of whether it has sneaked through again or not.
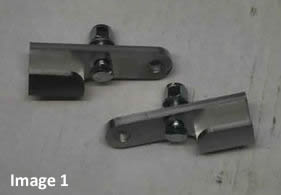
As my car is off the road for a short mid-winter lay up, I thought I'd take the opportunity to try and do something that would hopefully fix this problem for good. Some of you may have seen the handbrake improvers that are often on eBay (Pic 1), but at nearly £35.00 for the pair I could never bring myself to click the Buy it Now button.
The theory is quite simple, the added length provides better leverage, which applies more pressure on the shoe/drum. To produce the same effect for a fraction of the cost is quite simple if you have access to a mig welder.
After removing the handbrake lever, using a cutting disc, hacksaw or guillotine cut the lever at the mid point between angled section and the hole for the clevis pin (Pic 2).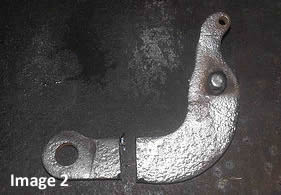
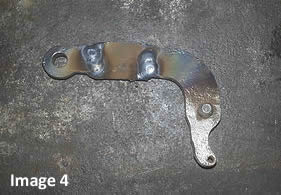
Then find a piece of steel of suitable thickness and cut to the required length, I chose to extend by 20mm. You can just about make out from the image that I have ground off each of the mating ends into a 'v', this creates a groove to weld into and will provide better penetration and a stronger join. Using mole grips or similar, clamp the sections together and weld nice and hot to ensure a good join (Pics 3 & 4).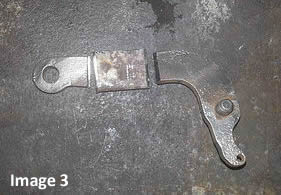
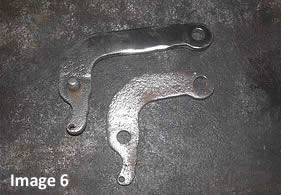
I ground off the excess and then cleaned up with a soft disc and wire wheel. Below you can see the finished article and a comparison between the original and modified lever (Pics 5 & 6).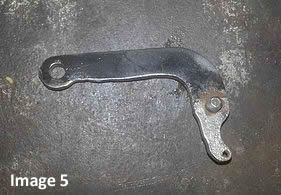
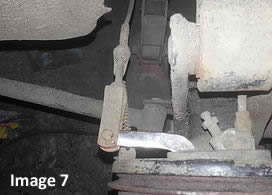
Then it's just a matter of refitting (Pic 7). The extra length does increase the amount of travel of the cable/lever, so ensure you re-adjust as per the Workshop Manual.
Footnote - I have to admit that I gave up on this handbrake mod and just decided to replace everything with new/original parts and ensured it was all set-up correctly.