Wheel Stud Upgrade
The wheel studs on the small chassis Triumphs are pretty marginal at the best of times, at just 3/8" it doesn't take much for them to let go when you don't want to. Especially likely if you have fitted alloys and/or wider tyres, all add to the strain on the short, thin threads.
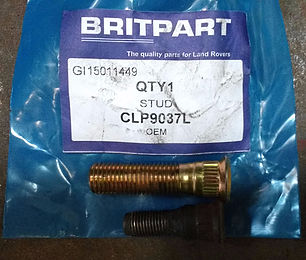
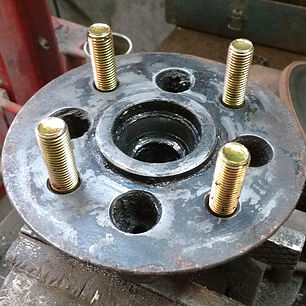
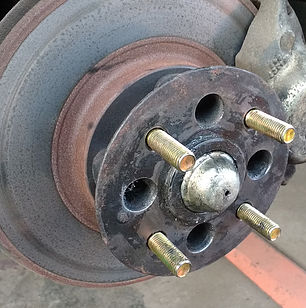
There are various alternative wheel stud options, but a quick Google and I soon found reference to those fitted on the Freelander to be a good option, an M12 thread so substantially bigger than the original and around 50% longer. So another quick search for Part No. CLP9037L and I had a wide choice of suppliers, but I ended up using www.paddockspares.com, apart from being the cheapest on the web, they had the correct bevelled head allowing them to be a straight swap. Pic 1 shows the difference in size, the Herald ones look tiny in comparison.
Anyone that has replaced wheel studs before will know that new original ones can be removed and refitted without dismantling the hubs, unfortunately that’s not the case with these ones due to their length, so if you’re thinking of doing it set yourself a morning aside.
The fronts are pretty simple, I’ll assume you know how to remove and refit the disc & hub (if not refer to your WSM), then undo the 4 bolts securing the brake disc to the hub and separate. The old studs should come out pretty easy, either use a press if available or some firm but not overly hard taps with a hammer should see them drop out, whichever method you use be careful not to bend the hub. If they are reluctant use penetrating oil and/or heat to encourage them. Insert the new studs, press in or pull in using washers or something else as a spacer and a nut (Pic 2 & 3).
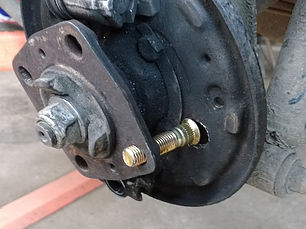
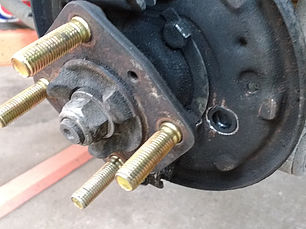
The rears are a little trickier as separating the hub is impossible unless you have the correct tool. If you do have a suitable puller then great, but if like me you don’t then all is not lost! Slacken off the adjuster and remove the drum and brake shoes. I drilled out a ¾” access hole in the back plate and fed the stud through, then pulled the stud into place using spare M12 nut and oversized nut as a spacer. I then used a blanking grommet to close off the hole in the back plate (Pic 4 & 5).
As these studs are considerably longer, if using closed type nuts, do ensure they are not bottoming out otherwise your wheels won’t be tight!