Brighter Headlights
There are two ways of improving the brightness of the headlights on your Triumph, or any classic come to that. Firstly you can replace the sealed beam units for halogen headlamps, available from all the usual traders and your Club Shop.
This is definitely a worthwhile upgrade if you use your car all year round, though it does really require that you have converted your charging system to an alternator as the old dynamos would struggle to keep up.
Secondly, and in my view just as important as the halogen upgrade, is to add relays into the circuit. There are two big advantages of doing this; your headlights will be getting a very healthy 12v plus supply direct from the battery and those 40+ year old switches will only be switching the relay rather than carrying the main current, this extends their life significantly. Out of interest use a multi-meter to see what voltage you are getting at the bulb connection, I bet it’s in the 10v range which will be having a huge detrimental effect on their brightness.
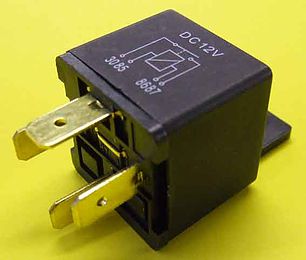
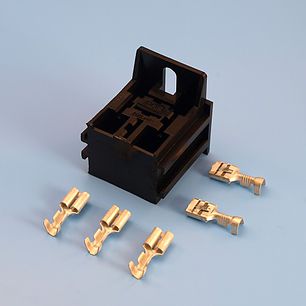
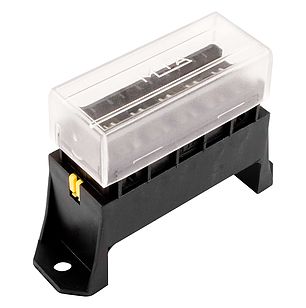
I won’t explain how to do the halogen headlamp conversion as its pretty simple, but for some car electrics can be a big daunting, so here’s how to add relays. Firstly you will need to get a few bits (Pic 1-3), I always use www.autosparks.co.uk but there are several other suppliers. Your shopping list should be:
- Blue/Red & Blue/White 17amp Cable as you will need to break into the circuit for both low & high beam.
- Black (Earth) & Red (12v) 17amp cable
- Ring connectors
- 2 x 4 Pin 30amp Relays
- 2 x Relay bases (neater than spade connectors)
- Heat Shrink
- 2 x Inline Fuse Holders or Fuse Box.
- 2 x 15amp Fuses
- Insulating Tape or Harness Wrap
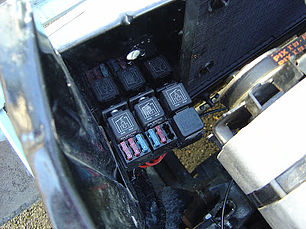
Think about where you want to mount the relays & fuse box (Pic 4), it’s not critical but somewhere with easy access to the wiring harness and a live supply would be good.
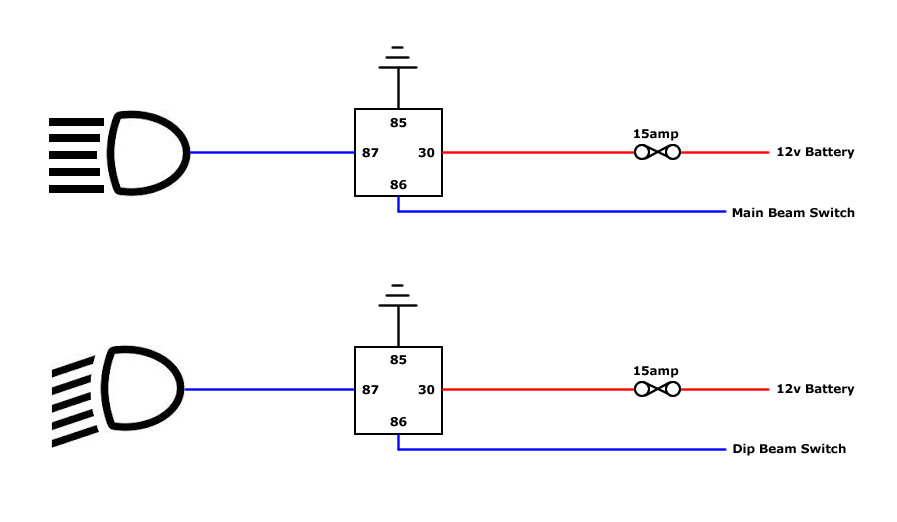
Firstly run a red (or a colour of your choice) live wire from a live 12v feed and connect to your new fuse box, this can be direct from the battery, but on my car I took it from the live side of the starter solenoid. From the same fuse connection in the fuse box continue the live wire to terminal 30 of the relay. Then run a black wire from terminal 85 of the relay to a good earth.
Now you need to break into the wiring harness and find the existing wires from the switch to headlights. Starting with the Blue/Red wire (low beam) cut the wire and extend both ends to where you have mounted the relays. The best way to do this is to solder the wires and then cover with heatshrink, crimped connectors are fine if you don’t have the means to solder, but not as neat.
The end of the Blue/Red wire on the switch side should be connected to terminal 86, the end on the headlamp side to terminal 87. Now follow exactly the same process but this time locate the Blue/White high beam wire (Pic 5).
Test the lights to make sure everything is working okay, if so tidy up the loom with insulating or harness tape.
Now get your multi-meter out again and compare the readings at the back of the headlight, this time it will be over 12v and your lights will be considerably brighter.